
Hello everyone!
Are you new to Adobe XD and eager to create your first prototype? You’ve come to the right place. In this blog, we’ll walk you through the basics of Adobe XD, from setting up your first project to creating a fully interactive prototype. Whether you’re a complete novice or have some experience with other design tools, this guide will help you get started on the right foot.
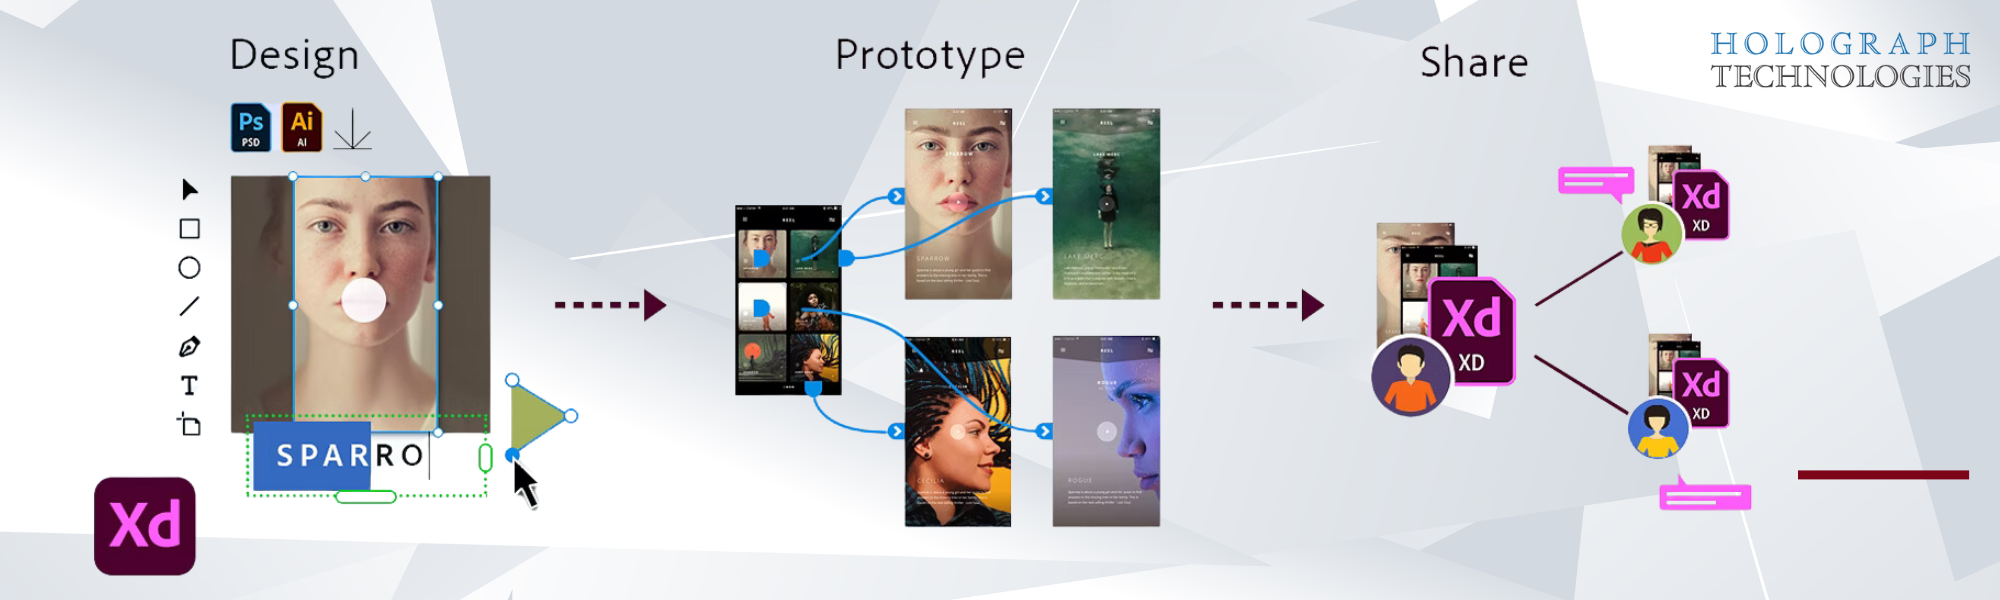
What is Adobe XD?
Adobe XD is a powerful design and prototyping tool developed by Adobe Inc. It’s designed specifically for UX/UI designers to create wireframes, interactive prototypes, and engaging user experiences for websites and mobile apps. The beauty of Adobe XD lies in its simplicity and efficiency, making it a favorite among beginners and professionals alike.
Getting Started with Adobe XD
Step 1: Download and Install Adobe XD
First things first, you need to have Adobe XD installed on your computer. If you haven’t done so yet, head over to the Adobe XD website and download the latest version. Adobe offers a free version of XD with basic features, which is perfect for getting started.
Step 2: Create a New Project
Once you have Adobe XD installed, open the application and create a new project. Here’s how:
- Launch Adobe XD: Open the application from your desktop or applications folder.
- Select a New Document: Click on “New File” or use one of the predefined templates like Web 1920, iPhone, iPad, or Custom Size.
- Set Up Your Artboards: Artboards are like canvases where you’ll design your screens. Start by creating a few artboards for the different screens of your app or website.
Step 3: Familiarize Yourself with the Interface
The Adobe XD interface is user-friendly and intuitive. Here are the main areas you’ll be working with:
- Tools Panel: Located on the left side, it includes tools like Select, Rectangle, Ellipse, Line, Pen, Text, and Artboard.
- Property Inspector: On the right side, it displays properties for the selected object, like color, size, position, and more.
- Layers Panel: Found on the left, below the Tools Panel, it helps you organize your layers and groups.
- Assets Panel: Also on the left, below the Layers Panel, it stores reusable assets like colors, character styles, and symbols.
Designing Your First Screen
Step 1: Add a Background
Start by adding a background to your first artboard. Use the Rectangle tool (R) to draw a rectangle that covers the entire artboard. Set the fill color to your desired background color using the Property Inspector.
Step 2: Add Text
Next, let’s add some text. Select the Text tool (T) from the Tools Panel and click anywhere on the artboard to start typing. You can adjust the font, size, color, and alignment from the Property Inspector.
Step 3: Add Images
To make your design more visually appealing, add some images. You can drag and drop images directly onto your artboard or use the Rectangle tool to create a placeholder and then fill it with an image by dragging the image onto the rectangle.
Step 4: Create Buttons
Buttons are essential for any interactive prototype. Use the Rectangle tool to draw a button shape and the Text tool to add a label. Group them together by selecting both elements, right-clicking, and choosing “Group.”
Making Your Design Interactive
Step 1: Link Artboards
To create an interactive prototype, you need to link your artboards. Switch to Prototype mode by clicking the “Prototype” tab in the top left corner. Select an element on your first artboard, like a button, and drag the blue arrow to the target artboard.
Step 2: Add Interactions
When you link artboards, you can define interactions like transitions, animations, and easing. For example, set the transition type to “Slide Left” and adjust the duration to make the interaction smooth.
Step 3: Preview Your Prototype
Click the Play button (triangle icon) in the top right corner to preview your prototype. This opens a new window where you can interact with your design as if it were a real app or website. Test all your interactions and make sure everything works as expected.
Tips for Designing with Adobe XD
Keep It Simple
When you’re just starting, it’s easy to get overwhelmed with all the features and possibilities. Focus on creating a clean and straightforward design. Use simple shapes, a limited color palette, and clear typography to make your design look professional.
Use Grids and Guides
Grids and guides are crucial for creating well-organized and balanced designs. Enable the grid by going to View > Show Grid or use guides by dragging from the rulers on the top and left sides of the artboard.
Utilize Repeat Grid
The Repeat Grid tool is a lifesaver when you need to create multiple copies of the same element, like a list of items. Select your element, click the Repeat Grid button in the Property Inspector, and drag to create duplicates.
Explore Plugins
Adobe XD has a robust ecosystem of plugins that can enhance your design process. From icons and illustrations to usability testing tools, there’s a plugin for almost everything. Check out the Adobe XD Plugin Manager to explore and install plugins.
Designing your first prototype with Adobe XD is an exciting journey. With its intuitive interface and powerful features, XD makes it easy for beginners to bring their ideas to life. Remember, the key to becoming proficient with any tool is practice. Keep experimenting, learning, and pushing your creative boundaries.
Are you ready to take your design skills to the next level? Our team of experts can help you master Adobe XD and create stunning prototypes. Contact us today for personalized training, tips, and support. Let’s bring your design ideas to life together!


